Tuesday, January 31, 2012

SAKURA ® Gears Up Bracelet by Gloriann Irizarry


I hope you have fun creating this OOAK piece. I enjoy to create these pieces. I included a whole set of instructions to create this Sakura Gear Up Bracelet .
Now have fun like I do with these wonderful SAKURA ® products and with the new Terri Sprouls Mixers these project will sure to have a SPARK.
Happy Crafting! :0)

Saturday, January 28, 2012

CHA Sneak Peak

At the CHA winter show - Sakura Hobby Craft is introducing a new line of products.  These "Jewel Effect" can be mixed into 3-D Crystal Lacquer and creates a paint like product.  These Mixer work on Metal, wood, and paper..  If you are going to CHA - please stop by booth number 844 and see these in person.  We have a total of 30 colors and if you mixed the color are endless....
We are coming out with
"Terri Sproul Mixers"
Jewel Effects
3 Interference colors
Ice Blue
Lilac
Green

Steampunk collection
Gold
Silver
Bronze
Copper Penny
Gold Dust
Red Satin

Pearls Collection
Red
Green
Sky Blue
Blue
Purple
Violet
Brown
Orange
Yellow
Pink
Rose

Shimmer Collection
Orange
Red
Blue
Sky Blue
Brown
Purple
Violet
Pink
Rose
Green


We also came out with a "Color Enhance" this helps enhance the color and give you a complete deeper richer look...  and for my Blingy friends I came out with "Ultra Fine Glitter".
Here is a short video for you to enjoy.......


Thanks for stopping by.......

Terri Sproul

Thursday, January 26, 2012

Kikoshi Cuties

There is so much excitement going on right now over CHA - and I really wish I were going to be there! At least my work will be there in several booths -including the Sakura Hobby Craft Booth. Sakura will be introducing the new Terri Sproul Mixers - a fantastic way to add color into the Sakura Crystal Lacquer. I've used some of these on my card today - the Red Satin and Gold Dust. I was able to paint this onto my paper and stamp right over it. It gives a really cool, almost metallic look. I know you are going to love it!


Have a great weekend!

Tuesday, January 24, 2012

Mixer Magic


My project this week is literally covered with the brand new Terri Sproul's Mixer's...beautiful mica powders that can be mixed with Crystal Lacquer for some pretty amazing results. I wanted to try it on several different surfaces to see what effects I could obtain....and what I got was really beautiful!
I started with these simple supplies:
light pink crepe paper rosette
a plain white paper flower
white plastic mini frame
a valentine cut out
a tim holtz rosette made with vintage sheet music
and I added the magic:
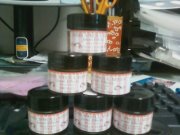
Terri Sproul's Mixer's in the following colors -
Red Satin
Silver
Gold Dust
Bronze
Here's a close-up of the pink crepe paper rosette with a layer of Bronze mica powder mixed with 3D Crystal Lacquer brushed on the top. I dipped the edge in Crystal Lacquer then dipped in Gold Dust mica.
I painted Red Satin mica powder mixed with Crystal Lacquer on a white paper flower, let it dry thoroughly, then stamped it with a handwriting rubberstamp using black StazOn ink. The little frame was white, and is coated with Silver mica powder mixed with Crystal Lacquer. I cut the word LOVE out and distressed it a little before gluing it to the backside of the frame. The little Valentine image was distressed on the edges, coated with Distress Crackle and then brushed with a small amount of the Silver mica powder. I layered a vintage music rosette, the Valentine image, then topped it with the frame and flower.
I'll be attending CHA this coming weekend and can't wait to visit the Sakura Craft Booth 844!  I'll be sharing with you all the good stuff I see next time! 
Till then.....stay creative
Karen

Sunday, January 22, 2012

Scrapbook Embellishments with Terri Sproul's Mixers


This year I plan will scrapbook more. I LOVE to scrapbook and in the last year or so have gotten away from working on the memory books for my family. That is changing this year--more on that later. When I started playing with Terri Sproul's Mixers, I immediately noticed how versatile these will be in many areas of my arting and crafting. There are so many applications...the design team has only began to play!
Today I am combining my love of scrapbooking with Terri Sproul's Mixers. I hope you enjoy the effects!

for this project you will need: Sakura 3D Crystal Lacquer, Terri Sproul's Mixers,
scissors, tape, paint brush, diecut letters and flame in black, matching
paper and photos [I matted mine with black cardstock]

I tested the colors I wanted to make "flames"...Terri Sproul's
Mixers are perfect for creating the illusion of fire!
start with a base coat of Blue Pearl color...it is an interference
color so it looks white in the jar but paints on Blue on Black Paper
I painted the letters while they were still barely attached to the
page out of which they were cut. 
In the test flame I painted the bronze and red satin separately. Here I mixed
the two to get an orangish color which I liked much better and used to paint
the letters and flames with on their 2nd coat.
flame with it's coat of orange.
I next painted with gold dust and gold.  The flames
really started to come to life! I love this look too.
The letters with their treatment of Gold Dust and gold 
The final touches included some Shimmer Pearl highlighting the flame!
I really love the Shimmer Pearl on the letters!
Here is the title for the page and the finished flames. These
"hot" embellishments are now ready to be placed on their layout!


These embellishments are perfect to tell the story about how "on FIRE" Will was at his 1st 4H Shooting Sports Competition--he placed 1st over all the junior shooters! I love how Terri Sproul's Mixers help me convey the story of that day! Thank you for looking!

I have posted a challenge over on my blog--leslierahye--to join me in scrapbooking this year. I plan to have 4 layouts (at least) a month done this year and this is my layout #3. Feel free to join my challenge and get some pages done!

Friday, January 20, 2012

Clay Jewelry with Becky Conley

WELCOME to my Sakura project.


This week I created a necklace from clay and blinged it with Sakura's new line: Terri Sproul's Mixers: Mica Powders = awesome metallic pigments.

SAKURA PRODUCTS USED:
3D Clear Crystal Lacquer
Ball Chain-gold tone
Terri Sproul Mixer Mica Powder: Gold & Bronze Satin

Other materials:
Makins Clay
Mono-filament 8lb clear

I cut the shapes from clay, let them dry and then painted with 3D Clear Crystal Lacquer mixed with Terri Sproul Mixer Mica Powder: Gold & Bronze Satin while they were still not assembled .

I had to sew the base pieces together with filament, then I attached the top layer of circles and stars with 3D Clear Crystal Lacquer.

Please become a follower of the Sakura's design blog for lots of inspiration and project ideas.

Cheers!
Becky

Wednesday, January 18, 2012

Art Saves

torsolamp2 torsolamp1
Art Saves
Supplies Used:
Paper Mache Torso (craft store) Lamp fixture & Blub *Optional
Copper Wings Stand for your Torso *Optional
Terri Sproul's Mixers (Red Satin, Bronze, Pearl Green) Rusty Chain and Keys
*Optional
3D Clear Crystal Lacquer Screws or Brads for Wings and chain.
Gold Leafing Pen Nylon Throw Away Brush
Rub-Ons & Lettering *Optional Awl and Scissors
torso1
Step 1: Mix equal parts of the  Red Satin and Bronze mixers together and begin liberally painting them onto your torso using a throw away brush.
closeup
Close up shot of the patinaed technique on the torso (click to enlarge)
torso1a
Step 2: Once your torso is dry begin applying the green pearl mixer over the rust in streaks and rub in with your finger (you want to give it an uneven streaky look like patina is). Step2A: Once the lacquer is dry using your gold leafing pen follow these previous directions  (step 8) in applying  HERE.
Step 2B: Once dry apply at 2 coats of the clear 3D Crystal Lacquer.
torso3
Step 3: Once the torso is dry again apply rub-ons and lettering as desired (if you do apply the above mentioned items cover generously with another coat of 3D clear Crystal Lacquer.
wingst
Step 4: For this project I chose to use real copper embossed wings that first coated with the mixers using the same process in Step 2 an 2A.
*Optional Steps*
torso5
Using your awl and scissors poke a hole and cut away excess to be able to fit your lamp fittings into the neck and on the side or back for the cord to come out of.
torso4
For my lamp fitting I used pieces from an old lamp. The collar the blub fitting fits into was a part off of my husband's old drill that I colored with alcohol inks.  Use what you have around, if possible. If you don't know how to do wiring (like me) ask someone that does for you, or you can buy a night light kit that is all in one.
torso6
For the torso stand I use a piece of rebar and an old faucet handle. Look around at what you have you'll be surprised at what you might be able to use.
torsolamplit
I chose to use a bulb that flickered
like a candle to give it a vintage look.

**Don't forget if your going to CHA to stop by
Sakura Hobby & Craft booth #844 to see the
new mixer line and this project up close

For more projects 
and inspiration visit
Aileen's Musings

Tuesday, January 17, 2012

CHA Winter Show 
Jan 29 - Feb 1st, 2012
Anaheim, CA 
Booth number 844


We are proud to announce our new product line
"Terri Sproul's Mixers"
Mixing  Your Creativity with 3-D Crystal Lacquer


Jewel Effect
These are powders that can be mixed into your Crystal Lacquer 
colors include:

Ice Blue Pearl
Lilac Pearl
Green Pearl
Shimmer Pearl
Red Satin
Bronze
Copper Penny
Silver
Gold
Gold Dust

Here are a couple sneak peaks at the projects I have been working 
on using my new line of products.  
Steampunk Top Hat
This is a Top Hat made from Creative Paperclay® and painted with my new Mixers

"Golden Wings"
This is a small canvas painted with Gold and Gold Dust. 
Made the wing with another part of the line
I will tell you about soon.

Hope you stop by our booth at CHA and visit me..

SAKURA ® Sea Scape 3D Art by Gloriann Irizarry


Sunday, January 15, 2012

Holiday Art

My friend has had this frame hanging out in his house for a long time and I've been DYING to alter it! It's white with a slight distressing.


And here's a close up.


And here's what I did. I used some colored lacquer to enhance the features of the frame.


Here's a detail shot. If you look closely at the frame, I used Terri Sproul Mixers to create the silver inside the frame. I mixed a little Black Lacquer, with a little clear Crystal Lacquer


I had this great idea... I have three little kids and I thought it would be fun to make some Easter eggs we could keep year round. I went in search of plastic eggs and would you believe, I couldn't find a single one? So we went in search of an egg shape and we found something! I covered it with clay, and allowed it to dry for a few days. In the process, it cracked. :( Once it was dry, I covered it with the same silver from the frame. And added a little more Terri Sproul Mixers! After those layers dried I added some colored lacquer and this is what I came up with... I'm going to have to figure out how to do this so it doesn't crack!


I hope you've enjoyed my projects!!

Thursday, January 12, 2012

Steampunk Canvas

I've got a project to share with you today that will show off the Terri Sproul Mixers - Jewel Effects that are premiering at CHA in a few more days. These powders add such richness to anything!


I made a canvas (although I may turn it into the cover of a mini-book later) The gears were cut with a Spellbinders die from Grunge paper, and colored using Sakura Crystal Lacquer and the new Terri Sproul Mixer Jewel Effects - Gold Dust, Glitter Red and Bronze Satin. I mixed these in with the Crystal Lacquer and painted them on. I was able to shade the gears using the Glitter Red.

Just look at the depth and textures you can achieve!


Well, since CHA is only about 2 weeks away, you don't have to wait much longer to get these Mixers! I know you are going to love them!